
Author:
Revised:
June 1st, 2020
I’m not going to lie, the installation process for a new air conditioner is complicated. When customers ask me what’s involved in the process, they’re often shocked to learn how much goes into it.
The more worrying fact is that there are many HVAC companies and air conditioner installers who don’t know all the steps that should be part of a good installation. It’s easy to cut corners so that an A/C system runs “good enough.” But “good enough” often means losing thousands of dollars in energy costs over the life of your system, and decreased comfort for you and your family. This is unacceptable.
Do you want a sleek, efficient machine powering your air conditioning, or a comfort-robbing trashcan outside your home? I’m guessing you’d prefer the former. Well, you’re in luck.
In this article, we are going to cover the entire air conditioner installation process in detail, from start to finish! If you’re committed to getting the most from your air conditioning system, read on. By the end, you’ll have the peace of mind that comes with understanding each step. It will also allow you to pick a company whose installation process is up to snuff.
Importantly, this is not a DIY guide. Air conditioning installation should always be handled by a licensed professional. Once you read each step involved, it should be easy to see why.
Planning the Replacement or New Installation of Your Central Air Conditioner
The world has changed so much in just the past few years. So imagine how much has changed in 10 years. Or 20. Or 30.
Most existing air conditioners that are replaced today are between the ages of eight to 30 years old.
Modern air conditioners are 20-50% larger in height, length, and width. This allows for a larger coil which, in turn, makes the air conditioner more efficient. Because of the larger size of modern air conditioners, the current location of your existing air conditioner may not accommodate the new one. Sometimes the air conditioner must be relocated, particularly if there are state or manufacturer regulations on space clearances surrounding your unit. Others require that unit to be within a certain distance to the utility meter. In some cases, this creates additional costs.
This is the first consideration for a homeowner, because it may require moving equipment or modifying your home’s ductwork.
So what’s the good news? Modern air conditioners are significantly quieter and more efficient than their predecessors, so your costs are often offset by these benefits.
Collecting A/C Information During the Home Estimate
During your initial in-home visit, the estimator has the responsibility of reviewing the existing air conditioning system. Important information needs to be collected so they can provide you an accurate proposal. This information is then passed to the installation team.
Depending on the job, specialized equipment may be needed, which the installation team can bring with them because of this step.
Having the proper information before the day of installation increases the chances of the job being completed successfully and promptly.
The Arrival of the Install Team, Review, and Safety
Before your installation team arrives, you should receive a call or text letting you know they’re on their way.
Many good HVAC Companies will also send pictures accompanied by bios of the installation team that will be working at your home ahead of time. This is an additional safety and comfort factor before a stranger enters your home.
Once they arrive, the lead installer will share and review the job information with you. This is often included in a packet that includes details of the job. This packet contains the equipment information, accessories to be installed, and any special instructions given by you to the estimator before the sale.
It’s important to allow a few moments for this review. This will prevent costly and aggravating mistakes from happening during the installation. Communication is a key component to a successful installation.
While you are reviewing the job details with the lead installer, the other member(s) on the team will use this time to start laying down floor protection and getting tools and equipment in place. They will also start a safety process that includes turning off electrical circuits and gas supply to the existing HVAC equipment.
Buy Your Furnace Filter From Fire & Ice
We’ve partnered with a national filter provider that has every size and brand of filter you could imagine, and have made purchasing yours easier than ever! Click the button below to get started, and have your filters delivered right to your doorstep.

Removing Your Existing Central Air Conditioner
Your existing air conditioner contains a refrigerant that needs to be removed before a new one can be installed. According to the EPA standards, it is unlawful to openly vent this refrigerant into the atmosphere.
A device known as a recovery machine must be used along with a recovery tank to safely and legally remove the refrigerant in the existing central air conditioner system. This is the only process that allows for the safe removal and proper handling of the refrigerant.
Any individual handling any refrigerant or equipment containing refrigerant must have an individual EPA certification. An EPA certification only certifies the name listed on the certification. Therefore, each member of the installation team, service team, or anyone who might handle refrigerant or equipment containing refrigerant are required by law to have their own individual EPA certification.
Once the refrigerant is recovered properly, electrical wiring is disconnected from the existing air conditioner. Near the air conditioner is a disconnect box, which is a safety device in case of emergencies. It can shut down your A/C unit.
From the disconnect box, a “whip” (flexible electric conduit) carries the power to the air conditioner. Good HVAC companies replace the disconnect and the whip when replacing an air conditioner, to ensure system safety.
In cases where an old system lacks a disconnect box, a new one is required by safety codes to be installed with the new air conditioner. There are specific installation guidelines for sizing and wiring the disconnect properly.
The circuit breaker should be turned off in the electrical panel before any work is to be done inside the service disconnect. Once all the existing connections are safely removed, the existing air conditioner is ready to be removed.
Preparing the Area for the New Central Air Conditioner
In most cases, the existing location of the air conditioner will require some prep work before the new air conditioner can be set in place. This prep work includes replacing the pad that the new air conditioner will set on.
New air conditioners are larger and taller than their predecessors. There are also times when the ground has sunk. Before the new pad can be set, the ground must be leveled. Good HVAC companies use a gravel base to level out or build up the area where the new air conditioner will be placed.
Some people think it is better to have a concrete pad poured for the new air conditioner to set on. A concrete pad is not necessary and can crack and shift drastically. When this happens, it is very difficult to repair or remedy. Instead, a composite pad is recommended. The composite pad is purposely designed to be outside and last the lifetime of the new air conditioner. Additionally, it’s often better equipped than concrete to absorb vibrations from the machine, which can reduce noise and shaking.


Once the new air conditioner is installed, it cannot be moved or lifted safely without damage in most cases. Many internal elements are rigid and pressurized. Moving it after it is connected could permanently damage the system. A composite pad can avoid damage to the air conditioner if it needs to be leveled in the future.
Removing the Existing Indoor Evaporator Coil
The indoor evaporator coil is the other half of your air-conditioning system that sits above the furnace, though in some cases it will sit below the furnace. This is what the other end of the refrigerant lines are connected to.
The indoor evaporator coil has two variations. One is cased and the other is uncased. In either application, the sheet metal plenum must be disconnected before the new coil can be installed. This process can be complicated when access to the coil is restricted.

The most common restrictions are rooms built around the system such as closets or finished basements. This prevents access to all sides of the coil or plenum. An additional charge may be added to the cost of the job based on difficulty. Because most indoor coils are more efficient, they are taller. Additional prep work to the supply plenum may be required before the new coil can be installed.
Removing the Existing Copper Refrigerant Lines (Line Set)
Next, the existing refrigerant line set can be removed. This is a set of two copper lines through which the refrigerant travels from the outdoor condenser, then back into the indoor evaporator coil.
The refrigerant line set is usually strapped to the bottom of the floor joists. These straps are removed, and the line set is taken down. It’s recommended that the line set be replaced in every case that it is exposed and accessible.

Refrigerant travels through the lines along with oil. In older air conditioning systems, the oil in the existing line set is different from the oil found in the new air conditioner. These oils cannot be mixed without damaging the new air conditioning system.
Sometimes the line set is concealed by a ceiling or in a wall, or it is buried underground or in concrete. Sometimes providing access is not an option or possible. In these cases, you have the option of finding a new location to run a new line set or reusing the existing line set remains. If the existing line set must be reused, it must be flushed and cleaned properly, then pressure tested. It is never recommended to keep an existing line set if it can be replaced.
Installation of the New Indoor Evaporator Coil
There are two options when installing a new evaporator coil for any new air conditioner system: cased and uncased. The preferred option is a cased coil, because it comes in an insulated cabinet with removable panels on the front that allow access to the coil inside.
The cased coil is also designed to sit on top of the furnace without any modifications, which makes repairs and modifications easy. In most cases, it will be painted to match the color of the furnace. The biggest benefit of using a cased coil is that it comes pre-cased by the manufacturer. This makes failure from an improper installation highly unlikely, regardless of the skill level of the installer.
When using a cased coil, it is already “installed” by the manufacturer and merely needs to be placed on the top of the furnace. The final step at that point is to connect and seal it to the existing sheet metal plenum.

An uncased coil is the coil without an insulated cabinet. They have more installation requirements and longer preparation time. They are available in the same variations as the cased coil.
Uncased coils are typically more difficult to install. However, an uncased coil will provide the same comfort and be just as efficient as a cased coil when installed properly.
Before the coil can be built into the existing sheet metal supply plenum, there is specific preparation required. These requirements are specified by the manufacturer. Failure to follow the installation manual’s guidelines may result in damage to the furnace as well as the coil.
The drain pan on the coil is plastic, so rails need to be fabricated by the installer to make sure the coil is sitting the proper distance above the furnace heat exchanger. This keeps the drain pan from melting. If the drain pan melts into the furnace, it could permanently damage the furnace or cause a fire.
Once the rails are built and installed, the coil can be installed into the supply plenum. If the plenum is larger than the coil, a sheet metal pan must be built with an opening provided below the coil. This opening needs to mirror the bottom opening of the coil for proper airflow from the furnace going through the coil.
If the opening is not big enough, or too much air goes around the coil instead of through it, the coil will freeze into a block of ice. This can damage the coil and cause a refrigerant leak by cracking the tubing carrying the refrigerant.
Once those are installed, the final step is building the front of the plenum. It is possible to build an access panel door into the plenum to cover the coil. This is not required by any code or manufacture specification, so it would be up to the installer. In all scenarios, the cover must have holes provided for the refrigerant lines, and then also for the condensation lines to be connected.
The type of coil chosen is mostly based on the details of the installation. Some won’t allow for a cased coil due to sizing restrictions, for example. Regardless, if the coil is installed per code and manufacture specifications to the existing duct system, can drain properly, and is sealed from air leaks, you will enjoy the same level of comfort. There is no difference in warranty or life expectancy between either type of coil.
Installation of the New Copper Refrigerant Lines (Line Set)
The new refrigerant line set is a combination of two individual copper lines. One line is always bigger than the other and is insulated. The bigger line is called the suction line, and the little one is called the liquid line. They come packaged together, rolled in a coil. It is available in multiple selections of lengths, from 15-50 feet. You will rarely need more than 50 feet in a residential home.
The key is installing the line with as few bends and turns as possible. When these bends are necessary, the soft copper can be bent by hand or a tubing bender.
It’s common to install the line set as close to your home’s beams and ductwork as possible. It’s also recommended that you secure the line every 4-6 feet. Plastic or copper strapping is common. Metal straps or clamps can be used, but it’s important to protect the copper wiring if the clamps touch them.
If you don’t properly protect the line, it can corrode. Galvanic corrosion (also called bimetallic corrosion) is the breakdown of metal when two dissimilar metals come into contact. This does take some time to occur. Nevertheless, if allowed to occur, it could eventually reduce the integrity of the copper refrigerant line over time until it causes a leak.

After the hangers are installed, the line set can now be put in place. Typically, an installer will start with the suction line and roll out one end a few feet, leaving the rest of the roll in a coil. They then push the unrolled section through a hole drilled through the band board of the house to the outside, near the air conditioner. Enough of the line is pushed out to reach the service valve of the air conditioner.
Eventually, the installer will connect this line to the air conditioner itself. The hole size will be between 2-2.5” in diameter, depending on the type of line set being used.
After the line is outside by the air conditioner, the line is secured by hangers near the hole and then another hanger back a couple of feet. The line is then carefully uncoiled and formed along the floor joists up against the trunk line ductwork or a beam, as straight as possible until long radius turns or bends are needed. Along the way, it gets put into the hangers that have been installed previously, securing it in place.
The line set will run from the air conditioner outside to the new indoor evaporator coil on top of the furnace. After the suction line has been installed and secured, the smaller, liquid line is run along the suction line, secured in the same hangers.
A line set should be new, installed as one piece, free from any sharp bends or kinks, and secured with an appropriate hanging system.
There will also be a small, low-voltage control wire that runs from the furnace along the line set to the air conditioner outside. The small existing wire coming from the thermostat to the furnace sends a low voltage signal to the air conditioner to turn on and off when a call for cooling is needed or has been satisfied.
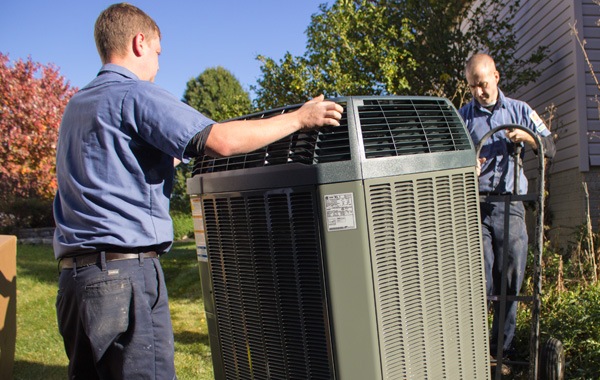
Setting the New Air Conditioner Condenser
So far, we’ve set the pad, leveled it, and our refrigeration lines and electrical disconnect are ready to be wired into the new air conditioner condenser.
Removing the new air conditioner and setting it on the pad is step one. After uncrating the unit, a good installer will inspect for any damage. Sometimes panels or coils will get damaged in transit. Any damage should be reported to you immediately.
Fire & Ice Heating and Air Conditioning runs multiple inspections on equipment, both when it arrives and when it’s installed, to ensure it is in working order.
If there is a dent, that doesn’t necessarily mean there is any damage that will affect performance. However, you always have the right as a customer to not accept the damaged unit and ask for another one.
The line set that was installed in the previous step is then formed and fitted to the appropriate service valve on the new air conditioner. The service valve is a connection point for the line set, and also isolates the refrigerant contained inside the unit. Service valves also allow for the outdoor condenser portion of the air conditioner to be isolated from the indoor coil and line set for future service or repair needs when needed.
Isolating the refrigerant keeps you from having to replace it with all new refrigerant in case of a repair in the future.
After the line set is fitted to the service valves, they must be brazed in. Brazing, a form of welding, is a process using two gases (oxygen and acetylene) and a filler rod made of an alloy metal and silver to join the copper line set and service valves. The valves are heated to a minimum of 1200 degrees Fahrenheit or until the filler rod will flow to weld the connection.
If this process is completed properly, the copper line set, the filler rod, and the service valve are all melted together for a tight, leak-free connection.
Filter Dryer Installation
Filter driers are a key component in the refrigerant system. They serve two main functions. The most important function of a filter drier is to absorb moisture. The second is to provide physical filtration.
When installing a new air conditioner condenser, you must always install a liquid line filter drier into the refrigeration system. Most new air conditioner condensers come with a liquid line filter drier for you to install.
Manufacturers recommend the filter drier be installed close to the expansion valve (TXV) at the indoor coil, as often as possible. This keeps the TXV protected and keeps the filter drier from being exposed to weather where it could rust.
There is also an arrow for flow direction. This arrow must always be in the direction that is going into the indoor coil.
Any contaminants in the refrigeration system are harmful. Water or moisture is the worst.
Moisture enters the system in different ways. If a system is not evacuated properly, moisture will exist in it. Moisture can also come from leaks or motor windings. The water can cause corrosion and create failure in metallic parts.
Water or moisture can also react with the oil in the refrigerant system. This is called hydrolysis, which forms acids in the system. Acids, moisture, or any other contamination in the lines will be extremely dangerous to the integrity of your new air conditioning system.
All good HVAC companies have strict processes in place for their install teams to prevent failure as much as possible. Any time a refrigerant line is open to the atmosphere, it is vital to install a new filter drier. This is true of installations as well as service repairs.
This brazing process is the same for connection to the indoor evaporator coil. This, again, involves open flames and should only be performed by a trained professional.
The gases used in the process are explosive. There is an open flame outside and inside the home. It can be dangerous to the installer, the homeowner, and the home, causing permanent damage without proper training. Following manufacturer and safety guidelines is key.
Preparing the line set for refrigerant in this way is the most important step in ensuring the safety and efficiency of your air conditioner.
Sadly, this process is unknown or not followed to most install teams. Not all companies are equal in training or processes, and many contractors lack the proper equipment. A good HVAC company will have all the tools and processes needed to install the air conditioner professionally and thoroughly.
After the line set is fitted properly into the service valves and indoor coil, heat protection needs to be applied. Heat protection can be a heat-absorbing paste, wet towels, or rags. Anything that would keep the heat spreading into either of the coils is acceptable. The service valves on the outdoor condenser contain rubber O-rings that will melt if they aren’t protected. If the valves are overheated and the O-rings are damaged, the refrigerant will leak past the valve into the line set, losing the factory charge.
From the factory, the air conditioner condenser is prepared, cleaned, and the refrigerant is added. If the refrigerant is exposed before the process is completed, it becomes contaminated, along with the condenser coil. If this step is performed improperly, all the refrigerant would need to be recovered and the condenser coil would need cleaned and prepared again before any refrigerant could be added.
Most indoor coils have a metering device called an expansion valve that will be damaged if not protected from the heat during brazing. If these get too hot, or any contaminants are introduced, the expansion valve will be compromised and fail to operate.
Once the heat protection is completed, a tank containing a gas called dry nitrogen is hooked up to a regulator and possibly a manifold gauge set. This allows the nitrogen to be purged while brazing. The nitrogen protects the inside of the copper tubing from oxidizing during brazing. The damage will not always be present immediately.
The HVAC industry requires brazing with nitrogen every time to prevent this damage.
Brazing with nitrogen, when done properly, will give the system maximum opportunity for performance, reliability, and dependability. After the system is brazed in both the indoor and the outdoor components, it must be checked for leaks using the same dry nitrogen, up to a specific amount of pressure. Using the dry nitrogen to pressure test the system achieves three things:
- It’s a preliminary leak test.
- The dry nitrogen will pick up moisture.
- It will also purge some contaminants out of the system upon its release.
It is very important to verify with the installation manual provided by the manufacturer what they recommend for pressure. Most systems are designed for 150 PSI when testing.
If there is too much pressure added, problems can occur. If the pressure is too high for the O-ring seal, for instance, the nitrogen will bleed into the refrigerant, contaminating it.
In this scenario, all the refrigerant contained in the condenser from the factory will be compromised and will have to be recovered, then the coil cleaned and prepped for more refrigerant.
If the preliminary leak test with nitrogen holds for a minimum of 10 minutes, then it’s time to move on to the next crucial step: vacuuming the system.
Typically a system is vacuumed to a minimum of 500 microns. The manufacturer's recommended vacuum is found in the installation manual. Refrigeration systems are designed to operate with only oil and refrigerant flowing through them.
Our atmosphere is made up of oxygen, nitrogen, and moisture. These are enemies to the system's operation and may enter the system during installation or servicing. Removal of these, along with air or other non-condensable products, is required. This is achieved through the vacuum process when installing the air conditioner. The vacuum process can take no less than 30 minutes and up to an hour or more depending on the size of equipment coils and length of line set.
Failure to provide a dry, moisture-free atmosphere before introducing the refrigerant into the rest of the system will in all cases promote an inconsistent operation, and eventually permanent failure of the system.
To achieve a successful vacuum on an air conditioning system there are several key tools and equipment that must be used:
- A reliable vacuum pump
- A micron gauge
- Manifold and hoses
- Vacuum rated core removal tool
The vacuum must achieve 500 microns or less in the system and hold the vacuum for this to be successful. This is also the second and final leak test. If a system does not hold a vacuum, then there is a leak somewhere.
Once a proper vacuum is achieved and has proven to hold, the system is ready to have refrigerant introduced to it. Refrigerant is the only product that can “break” the vacuum. If hoses are disconnected from the system before the refrigerant has been released into the system, the atmosphere will break the vacuum. If this happens, the vacuum process must be redone before refrigerant can be introduced.
With the hoses still connected to the service valves of the air conditioner, the refrigerant is released into the system, breaking the vacuum by opening the suction-side service valve first followed by the liquid side second.
Installation of the New High- and Low-Voltage Wiring
For the air conditioning system to operate, the high- and low-voltage wiring must be reconnected. Using the existing power supply from the electrical panel inside the home, the installer will mount a new service disconnect box. The disconnect is mounted securely to the side of the house using appropriate fasteners, based on the type of surface it is being mounted to.
There are two main types of disconnect boxes. One is fused and the other is non-fused. They are both appropriate to use outdoors. A fused disconnect allows the proper overcurrent protection required by the manufacturer. This type is most common and required when the main circuit from the panel exceeds the maximum required overcurrent protection. It also allows for additional safety to the air conditioner condenser.
A non-fused disconnect may be used only in cases where the breaker matches identically to the manufactures listed maximum overcurrent protection. There is a minimum and a maximum required overcurrent protection. You must be within these guidelines. The system will not pass the code requirements if they are not.
For example, if you have an existing 40-amp circuit that supplies the disconnect, but the listed overcurrent protection is only 30 amps, you must use the fused disconnect and install 30-amp fuses with it to properly protect the air conditioning condenser. If the amperage from the breaker matches the maximum or the minimum overcurrent protection, a non-fused disconnect is acceptable.

The service disconnect has specific locations for the high voltage circuit from the panel to be connected and specific locations for the power to get to the air conditioner itself through the electrical whip. They are identified as “Line” (wiring from the electrical panel) and “Load” (the whip that takes power to the air conditioner). This allows the pull inside the service disconnect to break or disconnect the power supply to the air conditioner without having to shut the breaker off from the main panel.
Because the air conditioner is outside, it would be cumbersome to run in and out of the house to turn the power on or off in case of emergency or servicing. The service disconnect is required by state and local code requirements.
There are also requirements for placement of the air conditioning condenser. It boils down to making sure there is proper accessibility. All the electrical connections should be made according to the NEC (National Electrical Code). The low-voltage control wire is connected directly into the air conditioning condenser at the proper locations according to the air conditioning condenser installation instructions.
This is the “signal” from the control board in the furnace sent through the wire to the air conditioner when the thermostat calls for cooling. The low-voltage control wire is what allows the air conditioner to cycle according to the parameters set regarding temperature and humidity inside the home. The low voltage wiring is connected to the control board inside the furnace on designated terminals.

Installation of the Condensate Drain Line
The moisture removed from the home during the cooling process travels down a plastic PVC pipe. It must be connected to the primary side of the evaporator coil. The evaporator coil has a primary and a secondary drain location. The primary condensate drain line will travel from the indoor evaporator coil to an appropriate floor drain or condensation pump.
A condensation pump is used where a proper floor drain does not exist in the home. There are also other reasons where a condensate pump is required or is beneficial to install. The important thing to remember if a condensate pump is used is that it must be serviced a minimum of twice a year to maintain proper performance.
Any condensate tubing or piping should be secured and glued with the proper cement. A trap and an overflow safety switch must also be installed in the condensate system. This is to protect the equipment and the area from flooding due to a restriction. The safety overflow switch is connected to the secondary port on the indoor evaporator coil and wired into the furnace control to shut down the system when it is tripped.

Startup Commissioning Process
The startup and commissioning (testing) process is done after the system is completely installed and ready to operate. The system is turned on and must run for 15-20 minutes. This will allow the refrigerant to flow through the system and start the air conditioning process.
Upon initial startup of the new air conditioning system, the house should be very warm or have a “load” with a warm enough temperature inside the home to allow for the minimum potential to charge the system accurately. A temperature above 75 degrees Fahrenheit is recommended in most cases. This allows the components in the air conditioning system to be in full operation to allow maximum cooling potential during charging.
Sometimes running the furnace to heat the house is a common practice to provide the necessary load on the home. After 15-20 minutes of operation, the system can now be commissioned.
A good installer will check the thermostat operation, system sequence of operation, and multiple other areas. While the system is operating, the following data is important to collect to ensure proper operation within manufacturers' specifications:
- Suction and liquid line pressure
- Suction and liquid line temperature
- Superheat
- Subcooling
- Outdoor ambient dry bulb temperature
- Indoor ambient dry bulb temperature
- Indoor wet bulb temperature
- Return air temperature
- Supply air temperature
- Static pressure from return side, supply-side, and total static readings
- Temperature drop calculated
- High voltage current reading
- Amperage on the blower motor, outdoor fan motor, and compressor
- Low voltage current reading
- Line set length
- Amount of refrigerant, if any, added to the system
- Distance above or below the outdoor unit is in relation to the indoor coil
- Blower speed tap/CFM recorded
This is the basic list of the proper data that should be known and recorded. This is the only way to know for sure how the system is operating and if it is within manufacturing specifications. If any of these do not fall within manufacturer specifications, your system may not be warrantied by the manufacturer.
Commissioning is important for several reasons. For you, the peace of mind that you are receiving a properly set up and adjusted system for maximum comfort, efficiency, and dependability. It also ensures the manufacturer's warranty will be in full effect. The benefit to the company installing the system is that it gives a baseline of operational performance in case any issues arise later.
It also gives the installing team confidence that before they leave, your system is in perfect operation. It is very common for systems to be installed and started up without much consideration for proper commissioning.
Unfortunately, many companies turn it on and walk away the moment cold air is coming through the vents.
Proper commissioning is a specific process that requires training and special equipment to perform the process correctly. It also requires additional time and labor on a job site. Commissioning is the only way to know for sure exactly how well your system is operating.
Why would a company skip this step, then? In a word: cost. Skipping this process costs a company less, which in turn might lower your initial investment slightly. This is a long-term gamble, though, with your money, your safety, and your comfort.
A good HVAC contractor will have trained installation teams that will properly commission your air conditioner before they leave the job.
Clean up and Closing Process
The cleanup process is comparatively simple. All material and old equipment should be loaded up and taken away from the home. The floor protection should be rolled up last, keeping all debris from the installation inside the drop cloth and out of your home.
All areas should be swept and free of any materials or debris. You should expect to see the area in the same condition in which it was found.
A walkthrough of what was done during the installation should be completed with you. Going over safety, maintenance, warranty, and all special instructions are expected.

As a final mechanical step, a locking cap should be placed on the outdoor portion of the unit. This cap can only be unlocked with the correct key. This is to prevent tampering with your equipment, and also to prevent theft of the refrigerant. This cap is often a specific color, which will let a technician know which type of refrigerant your system uses.
A visual inspection of the work completed should also be offered. Finally, a review of the commissioning and thermostat operation. After the final walkthrough, final signatures and payments are collected.
Installation Completed Professionally
The job is now complete!
The process may seem long and complicated, but in the hands of a skilled installation team, the entire process should be second nature.
Don’t cut corners with installation. Your money and comfort are at risk if any of these steps are skipped. Knowing the full process will allow you to hold companies accountable when you decide to invest in a new air conditioning system. The result will be a comfortable, efficient, long-lasting product.
Find the Best HVAC Company For You
Are you looking for a good HVAC company to install your new air conditioner system? We hope this article has given you some tools to assist in selecting one that meets your needs.
At Fire & Ice, we take pride in our installation process and hold our technicians to high standards to ensure the performance of your system. We believe in doing something right the first time.
Are you in the Columbus area and ready to take the next step with one of our experienced professionals? Call us today or schedule an estimate. We’d love to be the ones to install your next system.